According to dictionary.com, there are 24 definitions for "stock". I'm mostly interested in numbers one and nine.
1. A supply accumulated for future use; a store.
and
9. The broth in which meat, fish, bones, or vegetables are simmered for a relatively long period, used as a base in preparing soup, gravy, or sauces.
Stock is so essential to the kitchen, there is always a tupperware container of chicken stock in my fridge, and a ziploc bag full of frozen stock 'ice cubes'. It really is simple to make, but like pie dough, something simple in ingredients and preparation can still be difficult to pull off.
The prep cooks and my college, George Brown, certainly didn't know how to make a great stock. I remember at our exam day, I collected everyone's chicken bones and whipped up a stock, because what they had given us to work with was grey and disgusting. And stock can go from rich and flavourful to grey dishwater easily. But if you follow my tips, it will taste fantastic.
For chicken stock
1. You're going to need some chicken bones. Backs make the best stock. When I'm grocery shopping, I buy those small whole chickens, then when I get home, butcher them into 9 pieces. The back is just for stock in this house. But any bones will do, and use an appropriate sized pot. For instance, if you've just got 1 chicken back and a couple breast bones, then use a six- or ten- cup pot. Also, you can use cooked leftover chicken bones. The best taste comes from raw bones, but if you've got a carcass from a roasted chicken, that will make a great stock too! It might need to simmer a bit longer. Also- throw any extra skin into the pot too. Don't worry about the fat content, in the end your stock will be fat-free, but for now, that skin has a lot of flavour.
2.Start with cold water and plenty of it. Throw in your chicken bones in the pot and cover with cold water, to 1 inch below the top of the pot. You're going to need to replenish this water as it simmers away, so fill up your kettle while you're at it.
3. Add the essential veggies. Absolutely essential are : carrots, onion, celery, garlic. Throw in 1 or 2 carrots, chopped into big pieces (don't worry about peeling them), 1 or 2 stalks celery (this is a great way to use up the inedible tops and bottoms), 1/2 to 1 yellow or red onion, peeled and chopped into 4 and about 3 peeled garlic cloves. Smash them on the counter with your fist to crush them. Make sure to add these ingredients in proportion. They all have strong, distinct flavour and too much of any one ingredient will cause it to over-power the stock.
4. The rest of the veggies. What adds depth to a stock is a variety of ingredients. For a basic stock, add parsley, tomato, fresh thyme, or rosemary. You'd be surprised how much parsley brings to the table. I usually save the stems just for stock. If I'm making a stock to be used as a base for an Asian soup, then I will also add to the stock ginger, cilantro and lemmongrass.
5. What not to use. Don't add any acid, such as lemon or lime. This will contribute to a nasty taste and grey colour. Don't add any bell peppers. They will make a stock oily. Also stay away from veggies that are particularly pungent, such as parsnip. Oh, and don't use any potatoes, ok?
6. Dry goods. Finally, add a pinch of peppercorns, a couple bay leaves and a tablespoon of salt. Oh yeah, don't be shy. This is what will help bring out all the flavors of the chicken and veggies. If you don't add some salt right at the beginning, it won't taste like much.
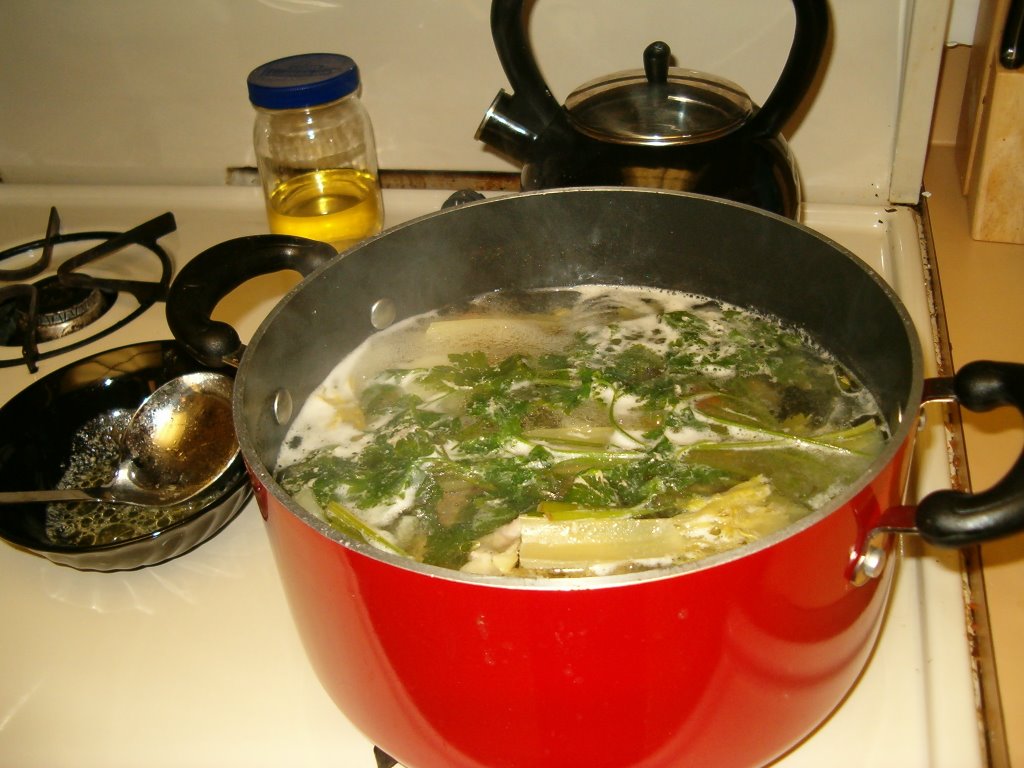
7. Light my fire. Put the pot on the stove over high heat until it boils. Reduce the heat to low, and let the stock simmer for 2-3 hours. Make sure to skim off any foam that rises to the surface- this is the impurities from the chicken bones and skin, and you want to get rid of it. Usually most of this stuff comes to the surface in the first 15 minutes of cooking. As the level of water in the pot decreases, add some more fresh water. You want to keep the bones and veggies submerged. Another important point: Don't stir the stock! You can stick you spoon in there and wiggle it to move around the veggies, but if you stir it too much, the fibers and bits and pieces of the veggies will break down and you'll have a cloudy mess. On the same note, don't let it boil vigorously.
8. Finally, after a few hours, you can strain the stock and stick it in the fridge for tomorrow. Make sure you strain into a bowl and not down the sink! Throw away that nasty veg, or compost it, but don't eat it ok?
9. The next day, check out your stock. It should be yellow in colour, thick and with a slight jello-like consistency. You can thank gelatin for that. On the surface of the container, you'll see a thick white substance. That's the fat, and go ahead spoon it off into the garbage. It should be easy to lift it off.
I think that's it. What a mouthful!


2 comments:
Congrats on making stock...This has always been something I've been scared to make because of the long process. I know it's worth it at the end, though.
The great thing about stock is that you can throw it together in ten minutes- after that, it dosen't need much attention.
Post a Comment